When it comes to managing and creating WordPress sites, there are sample tools to choose from and so page containers are one of them. So, if you want to put a page container in your WordPress site, consider this article.
To add Page Container, kindly follow below steps:
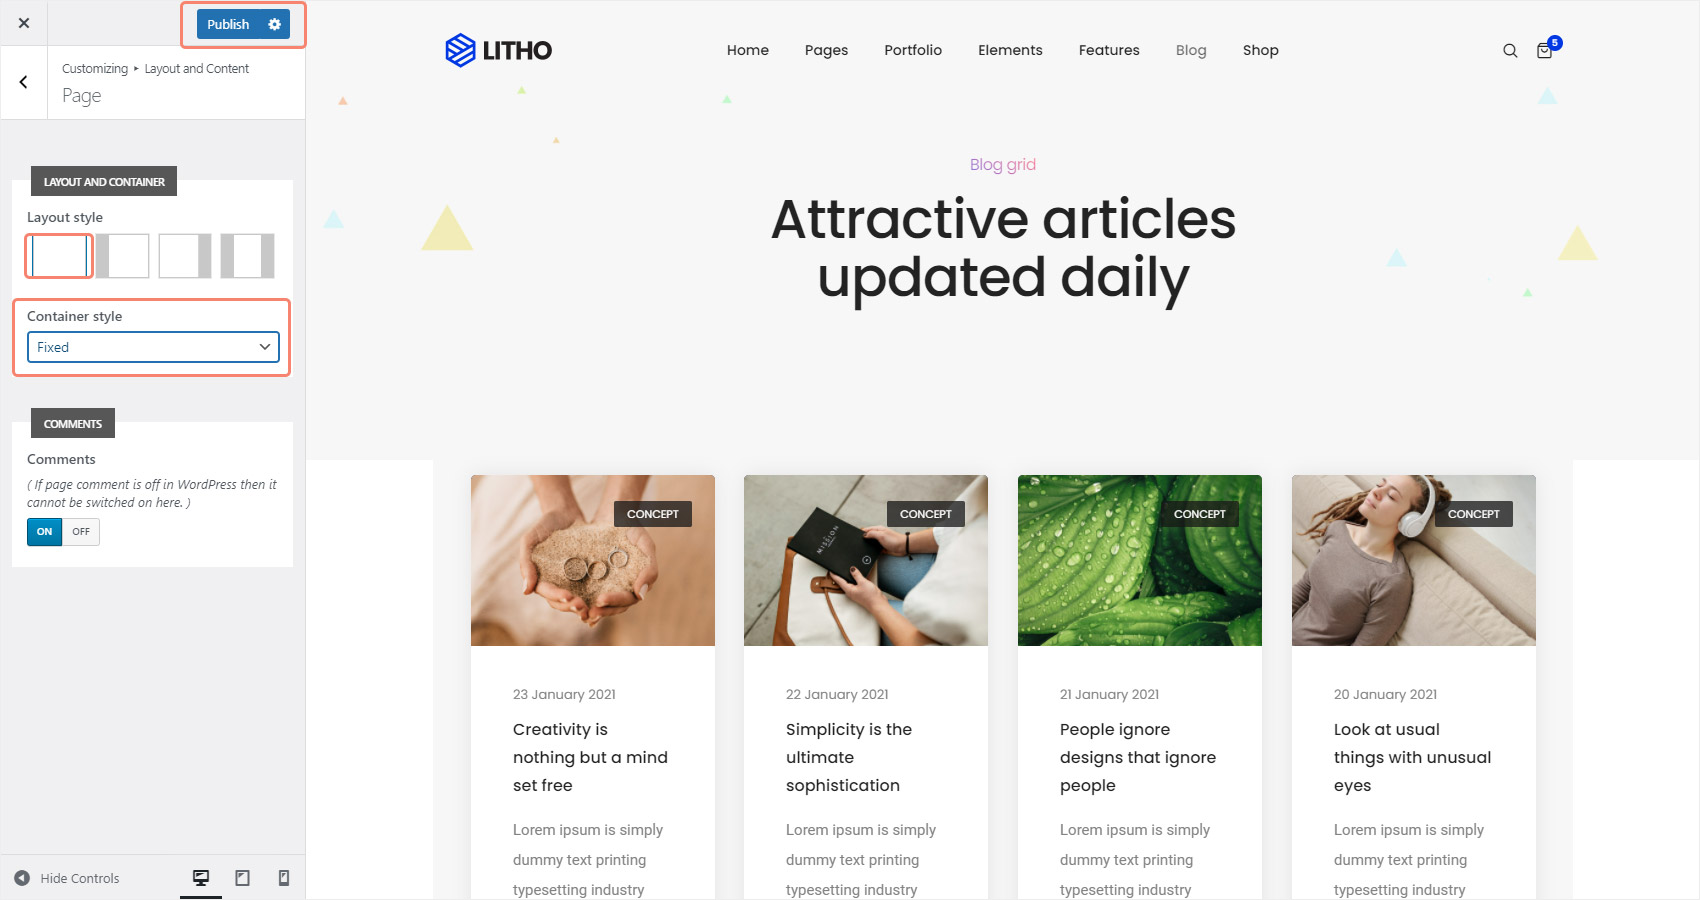
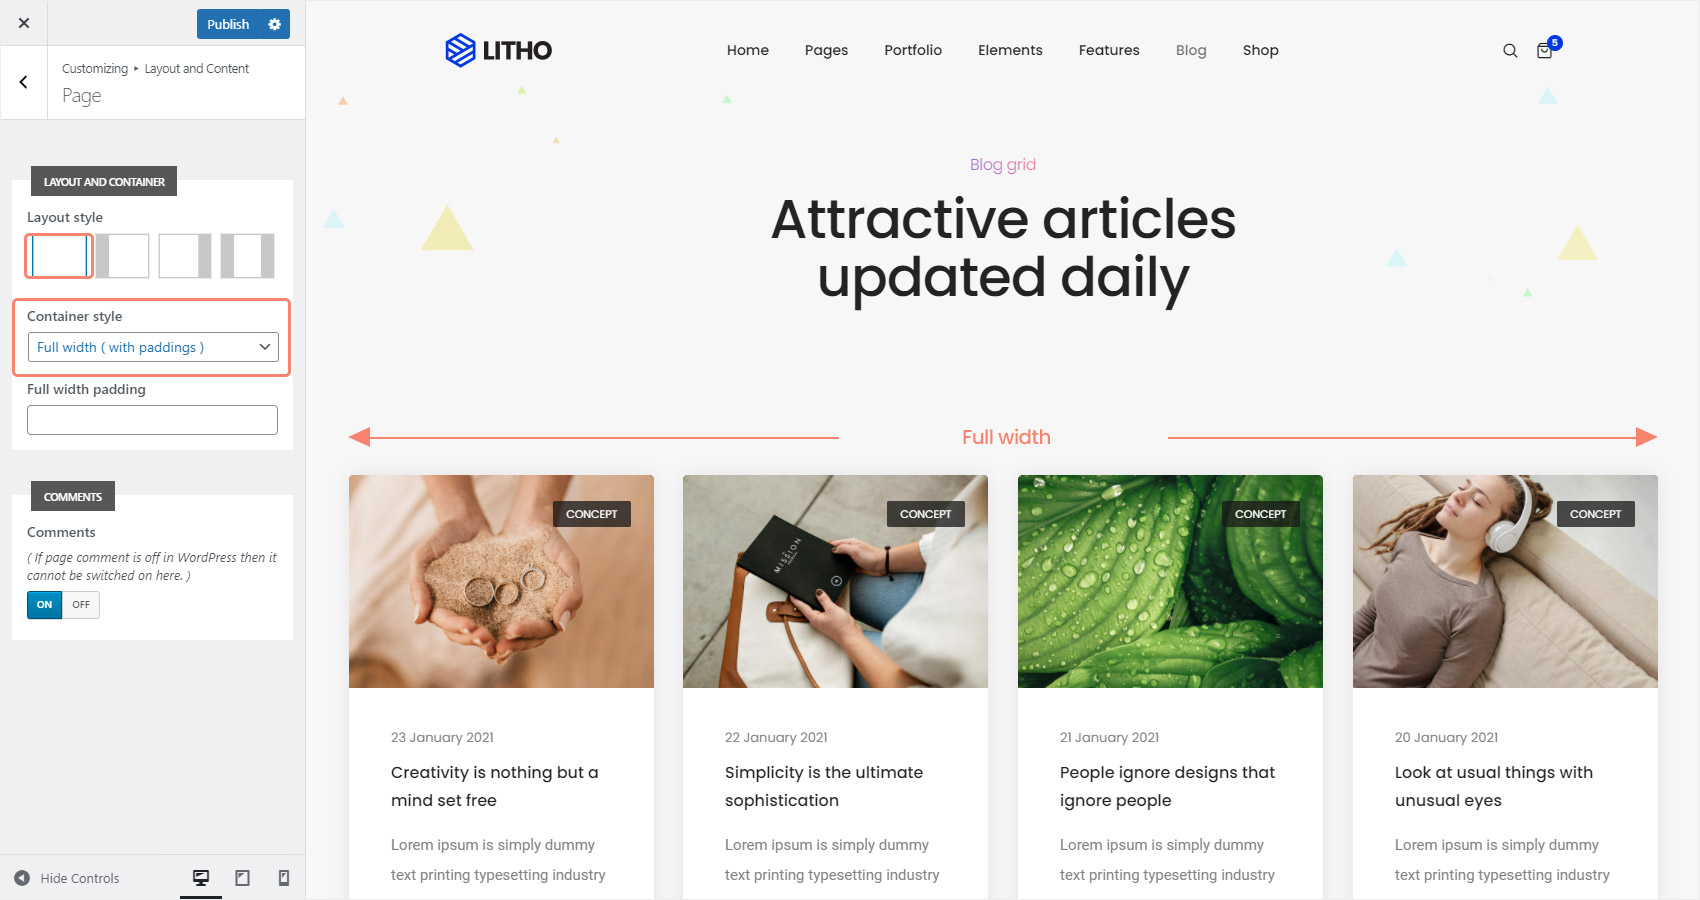
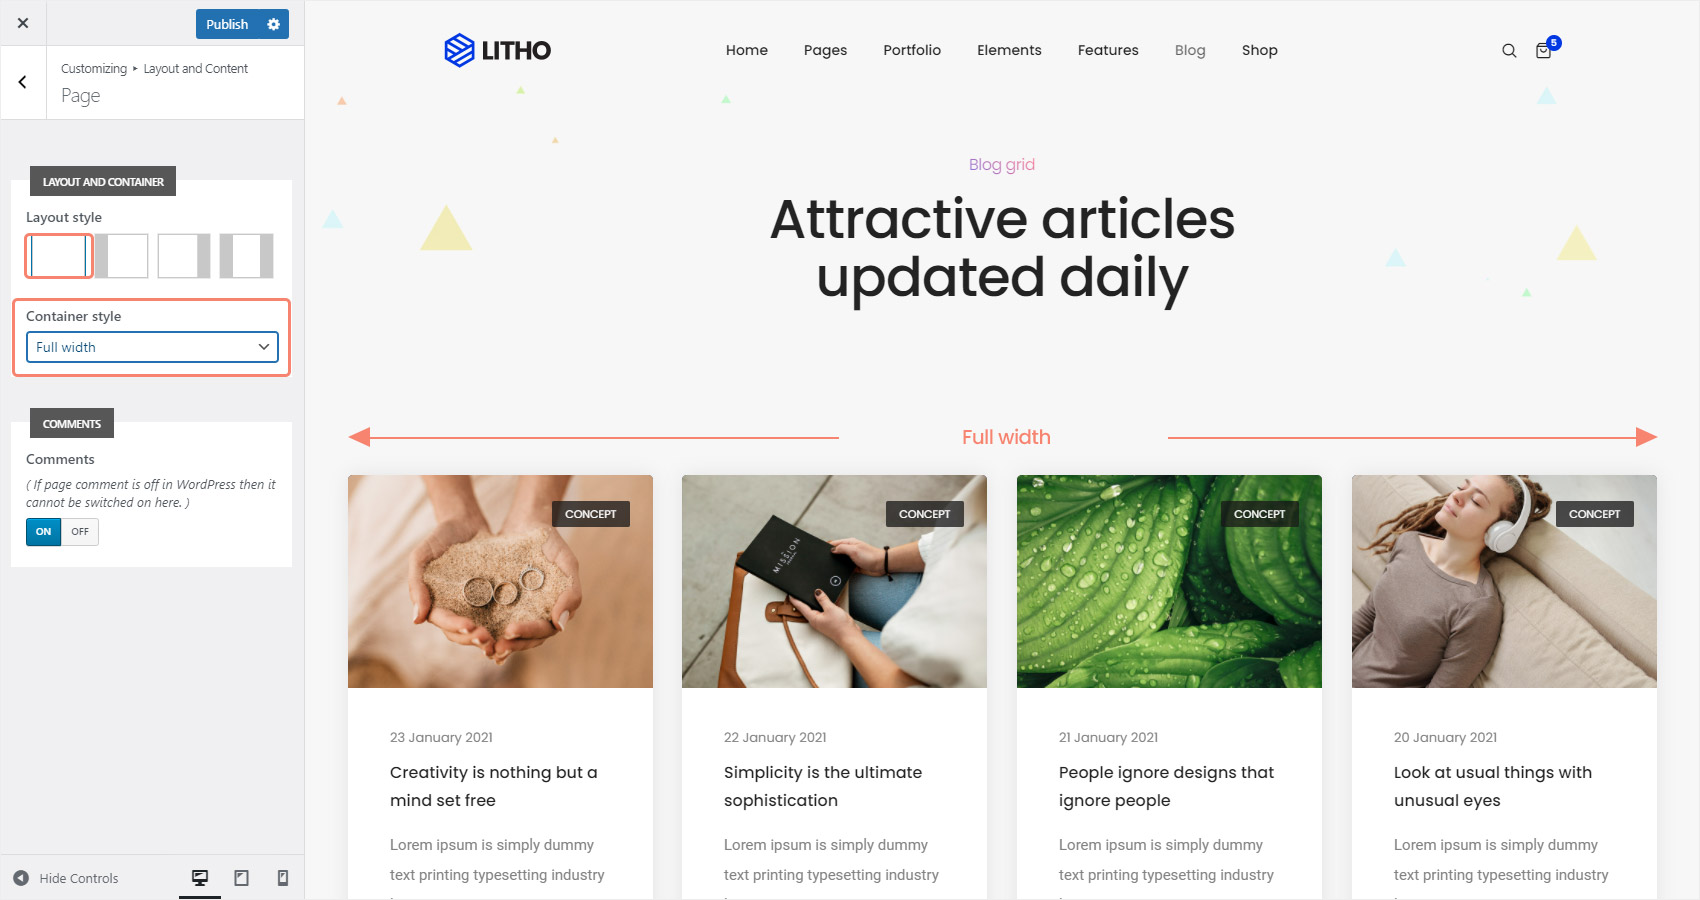
Step 1: Go to the admin panel > Appearance > Customize > Layout and Content, then select the section you want to change. Here we are going to select “Page”.

Step 2: Select any of two choices from the drop-down menu called “Container Style” and see live changes. Click on the publish button to save the changes.
Option: Fixed
When you choose this option, the container style changes to fixed.
Option: Fluid / Full Width (Padding)
When you choose this option, the container style changes to full width (Padding) which will give spacing to the both sides of the container.
Option: Full Width
When you choose this option, the container style changes to full width that means there is no side spacing or padding. All containers are in full width.
Altering container style per Page/Post/Portfolio
You will be able to change container style for any single page/post/portfolio only. Simply follow the steps below.
Step 1: Go to WordPress Admin > Pages > Edit Page. Scroll down to the section “Litho Page Settings” and open “Layout Settings”.
Step 2: Find the “Container Style” drop-down menu and select any of the two styles and click on the “Publish” button to save changes.
