To create a transparent header, you first need to create a header using section builder.
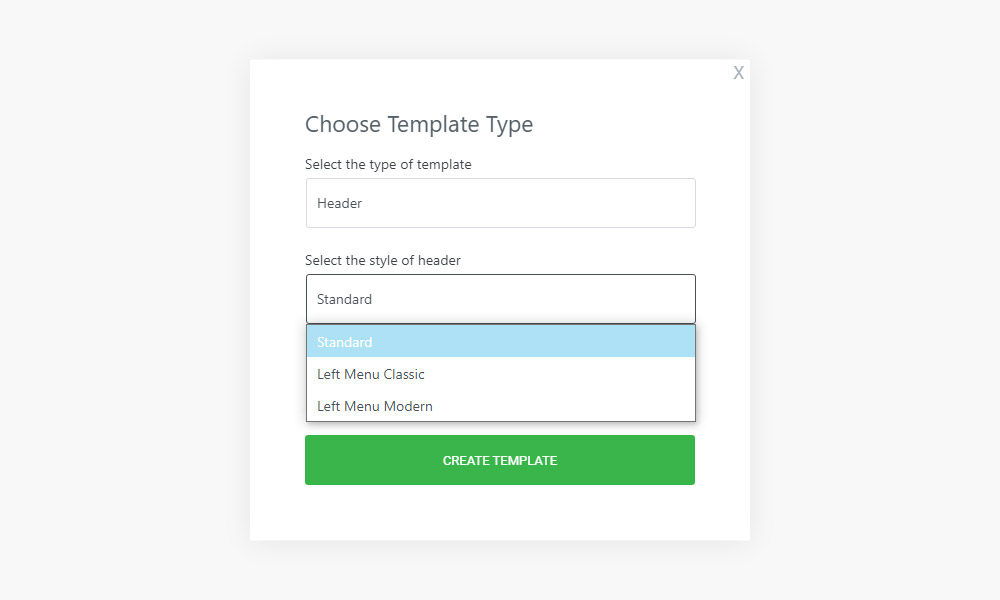
Go to the admin panel > Section builder > Add new > Choose template style > Header and select header style as standard. Give a name and click on “Create template”.
Note: For transparent header, always select “Standard” header style.
See below image for more understanding.
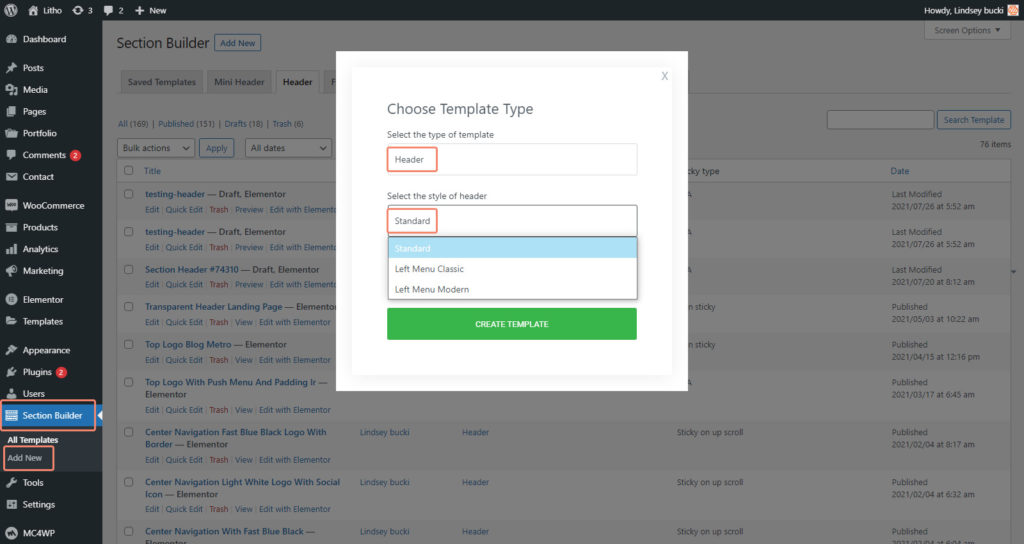
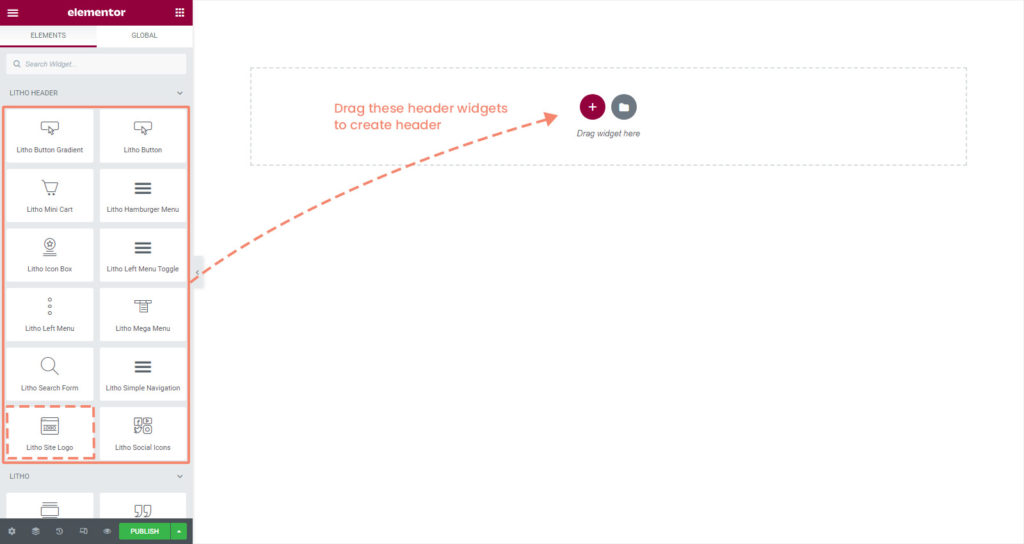
After clicking, the Elementor editor page will open like the image below.
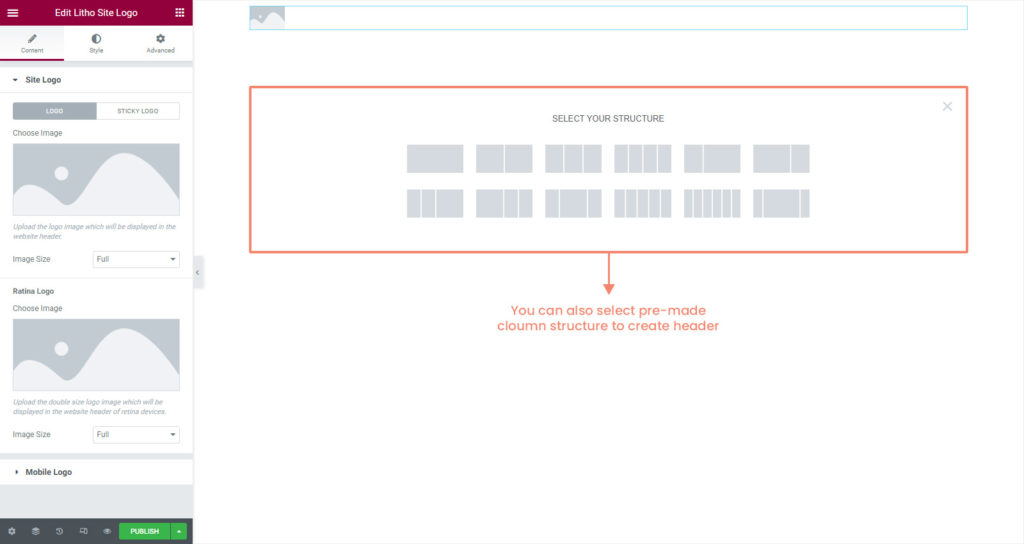
Before dragging the widget, you can also select your column structure like in the image below.
Header has a special widget section named – Litho Header. Where you can find individual widget for each feature like “Litho site logo” to put your company’s logo in the header section.
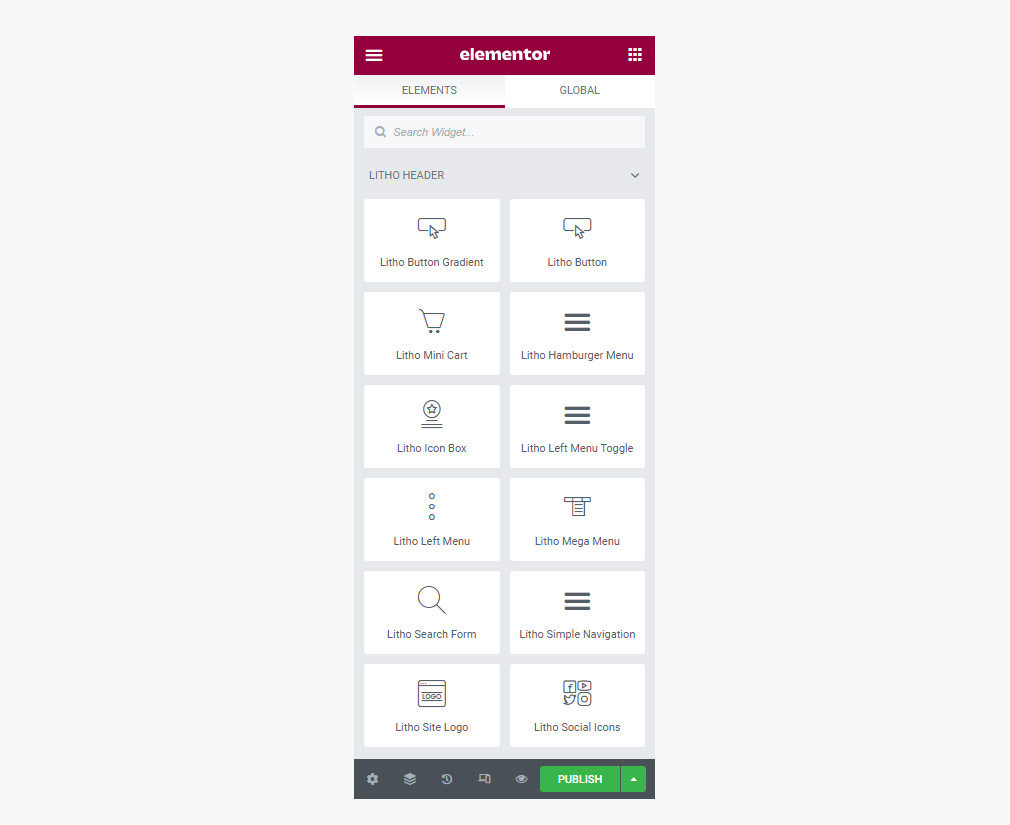
You can use these widgets to make your header creative and unique. Just drag & drop and edit the widget as per your requirements.
For transparent header, you can edit the header section by navigating to the style Tab like below image where you can choose background.
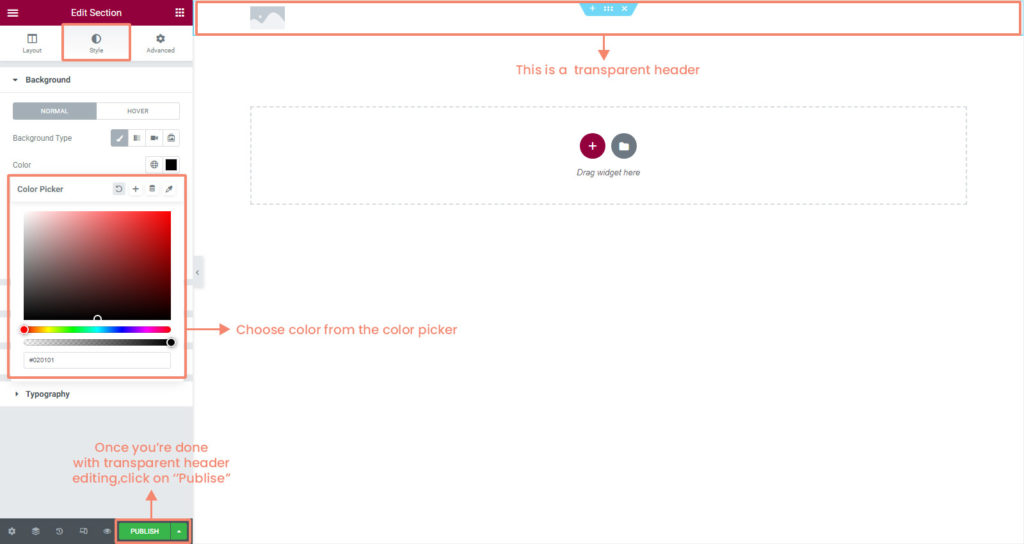
Once you’re done with the customization, click on the “Update” button and see the changes.
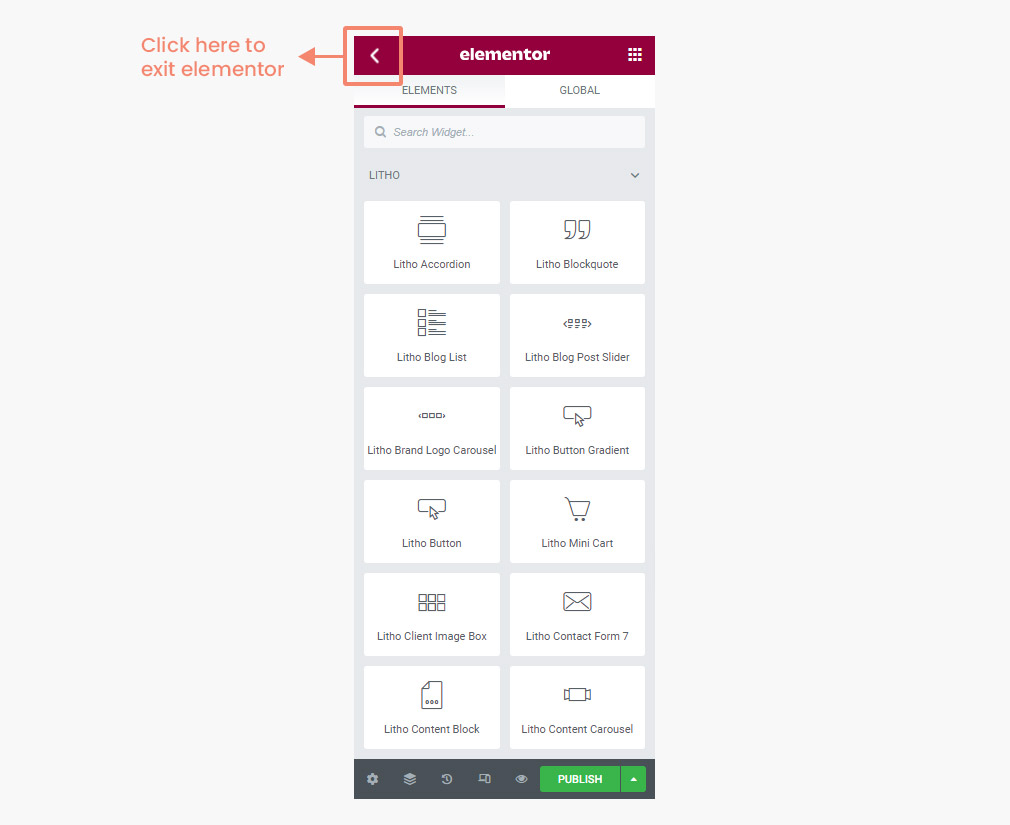
To exit elementor click on the upper left side button like below image.
How to choose the sticky type for the transparent header?
You can also choose the sticky type of the header section.
For that navigate to the Admin Panel > Section builder > All template > Header and choose the template that you want to edit.
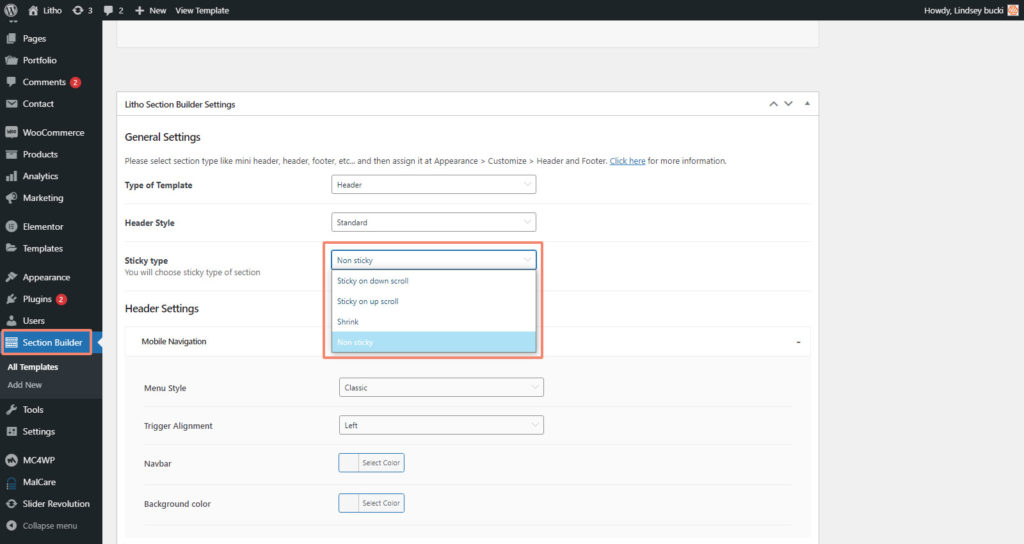
There are four options to choose the sticky type for the header section.
